

This is a guide to making a very simple procedural texture for Maya. As with all procedural textures, the basic texture can be refined and added to.
Step 1 It's a texture!
Open up the Hypershade (Window > Rendering Editors > Hypershade). This is where you can edit any textures as well as other nifty things, such as view planes. On the left of the Hypershade pane, under the Surface section, click Lambert to create a Lambert material.
Step 2 But it's grey...
The basic brick texture is a Ramp. So, if you select your new Lambert texture and have a look at the Attributes Editor (the first of the three buttons in the top right of the main Maya window toggles this), you can now see the material attributes. To keep things simple, we're not adding a bump map or two, just a color map. So click the checkered button next to Color.
This gives you a selection of different nodes that can be associated to the Lambert texture you just created, giving it color. In this case we want a Ramp node, so give that a single click.
Step 3 That's not even remotely brick-like?
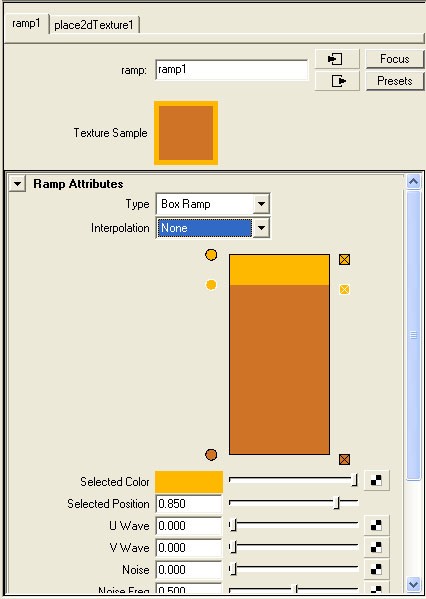
What you should be able to see now is the attributes of the Ramp that you've just created. It's most likely the default V Ramp, so select the ramp type and change it to Box Ramp, then just underneath that, go ahead and change Interpolation Type to None.
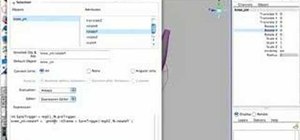
If you can't find the ramp attributes, bring the Hypershade back up, select the texture you created in the top pane, middle mouse drag it down to the lower pane and (making sure it's highlighted with a yellow border) click on the background of the lower pane and select Graph > Input and Output Connections from that menu.
Choose some brick-like colors. The brick color is going to be the lower color and the mortar the upper color. Then drag the slider to the left of the color bar up, so it's mostly brick, with a bit of mortar round the edge (I went for a position of about 0.85, but you can set the exact position in the Select Position box just under the color bar).
Step 4 Still not bricks....
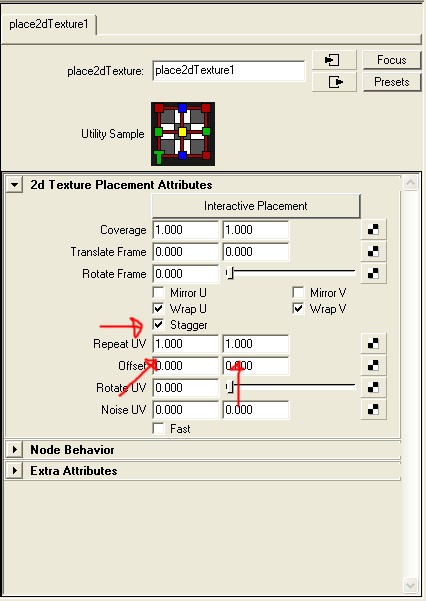
Okay, so the last thing we need to do is set up that staggered brick pattern, so from the Ramp Attribute, select the Place2dtexture Attribute that should be the next tab along.
If it isn't, then go back to the Hypershade, and you should be able to see it sitting to the left of the ramp node.
Take a moment and think about how many courses of bricks you want on your wall (how many bricks tall it is). This is—should be the V repetition. Halve that number for U repetition. Then just above the Repeat UV boxes tick the box marked Stagger.
You can see the results either in the texture swatch in the Hypershade, or more accurately in the main Maya pane by choosing Shading > Hardware Texturing.
Step 5 Et voilà!
This should now be a very simple brick texture. If you wish, you can go back and use the same method to attach a bump map to the texture.
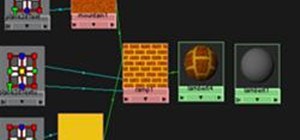
Additionally, you can use other procedural nodes, linked to the color attributes of your Ramp node, to add more detail and variation to the texture.
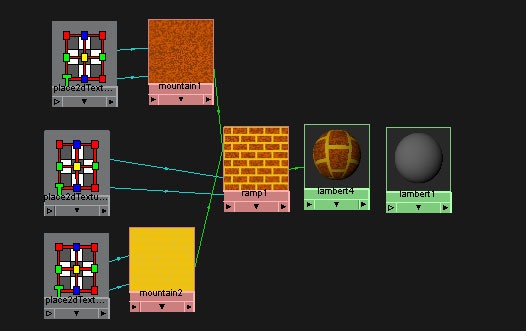
You can see here, I just used a simple mountain node to add some noise to the brick and mortar elements.
Tips
- You can stack nodes to add noise or detail to your textures.
- You probably don't want to cover the whole model with a brick texture. You can select Edit > Convert to File Texture from the Hypershade's menu and create a texture file that can be edited in another program.
Just updated your iPhone? You'll find new emoji, enhanced security, podcast transcripts, Apple Cash virtual numbers, and other useful features. There are even new additions hidden within Safari. Find out what's new and changed on your iPhone with the iOS 17.4 update.


2 Comments
nice tut, but i've got a problem, i can't link the mountain texture with the ramp :(, would u mind helping me pls
nice
Share Your Thoughts